Wiring your tiny house can be a big deal if this is your first time doing it, as tiny house electrical issues can arise without notice.
- The fear of blowing circuits
- Sparking fires
- Causing electrocution
often prevents most people from trying to rewire their house, let alone installing a new electrical circuit from scratch.
This article will walk you through wiring a tiny house electrical system step-by-step. We will attempt to overcome your worries. Before we start, it is safe to look at The National Electrical Code (NEC). This code is a set of guidelines and regulations that lays the groundwork for electrical safety. You can use it for residential, commercial, and industrial settings.
Now, let’s get started!
Contents
How Does a Tiny House Get Power?
Powering your tiny house depends on how much electricity you use. You don’t want to run an illegal connection and get busted. The only ways to power your tiny house are:
- Rely on the electrical power grid
- Completely live off the grid
- Use a hybrid strategy
Whatever method you choose to supply electricity to your tiny house will need preparation. It must also follow all applicable codes.
Read through as we expound on each of these reliable power sources.
Electrical Power Grid System

Your electricity meter and power box will receive power from the grid via the power company. In this case, the only significant difference is that the plug wiring the power line to the panel is absent.
The most important thing to remember is that every municipality will handle things different. You must keep track of the various codes each county uses.
Living Off The System
You can use renewable sources to produce electricity when you begin living off the grid. These sources include solar panels (the most expensive option), power generators, and wind.
- Standard Hook-ups
The most popular method to provide power is using an extension cord. You can run an extension line from your tiny house to a connection stub with the power source.
You can find these hookups in the backyard of the closest stranger, family member, or landlord at an RV park. Others may rent or buy a property with an existing electrical supply.
Even though it’s not complicated, there are still a few things to bear in mind to make your wiring more convenient and affordable.
Using a drop power cord with a 50 amp rating is what you need. Although you may go smaller, using a complete 50 amp circuit provides some buffer and potential expansion. Check the power supply box and turn off the power. (If the camp hookups have a faulty installation that might burn your electronics). An RV park generates a distinct power quantity. Also, bringing a converter is crucial if the camp cannot supply the energy you need.
- Solar Panel System
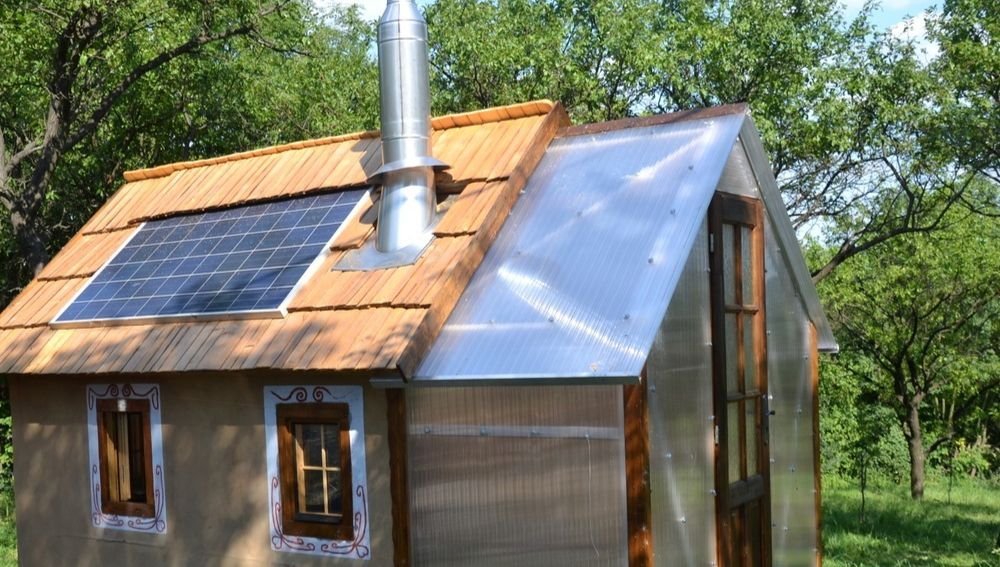
The most common renewable source of energy supply is solar power. In actuality, tiny homeowners often use these off-grid supplies. While some use solar power as their primary source of energy supply, others use it as a backup plan for when the power supply fails (for emergencies). Depending on your power requirements, your budget and the number of panels you need will vary. Nonetheless, off-grid solar power systems for tiny homes cost between $4,500 and $11,000.
The fundamental components of a solar electric system are
- Photovoltaic (PV) Panels
- Wiring
- Batteries
- An Inverter
The power your solar panel array generates will be in direct current (DC). It needs an inverter to convert to an alternating (AC) current.
You can install solar panels nearby on the ground or top of your tiny house. You can house the batteries and inverter within your tiny home or in an outdoor utility area.
Yet, if most of your tiny house is in the shade, a solar electric system will only operate if it needs excellent sun exposure.
- Windmills
This electrical alternative is excellent for people planning to live off the grid, especially in windy places. Windmills are one of the more eco-friendly ways to generate electricity. Only some people who live in tiny houses have installed wind turbines on their roofs. They also take advantage of other renewable energy sources.
There are, without question, certain advantages to using windmills. First, installation and investment expenditures are affordable and within your budget. Second, it is beneficial to the environment. Since they don’t need a power system, they are far from being harmful or dangerous to the environment.
But then, there are a few crucial considerations to make. First, windmills can produce enough power to fulfill all your needs. They rely on wind speed. Thus, before buying and installing a windmill, you must exercise caution and conduct relevant research. Second, they face the risk of getting harmed in the event of a lightning storm. They can also be rather noisy.
Since solar panels and windmills depend on specific climatic conditions, you should do your research.
- Power Generator
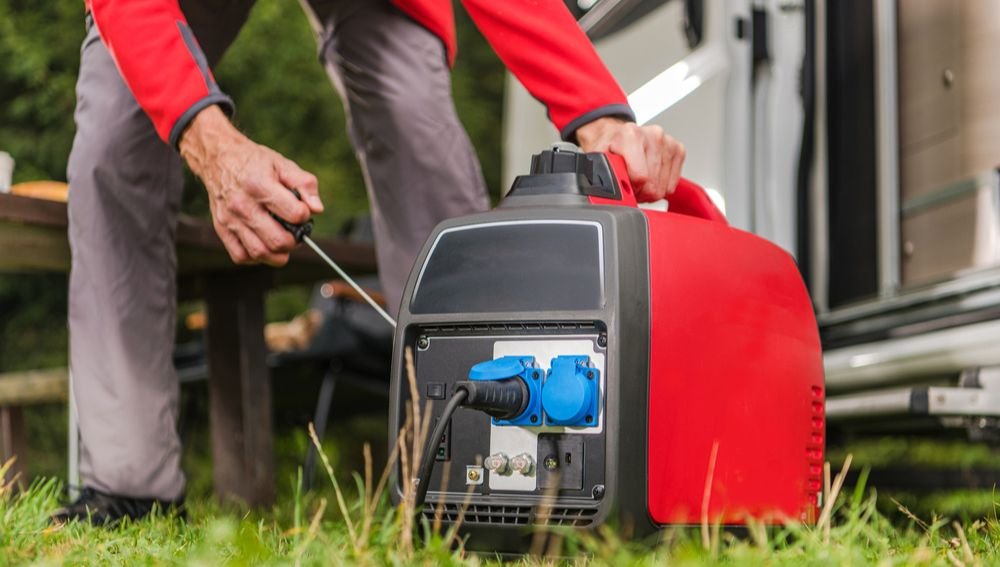
Different generators have varying supply capacities. Generators powered by diesel are the most common. They are cost-wise and inexpensive. Also, they have the highest electricity rate. Gas generators are yet another fantastic choice for off-grid installations. You don’t need to worry about your power source as long as you have it and can refuel it whenever you want.
Though it may be challenging to comprehend, reducing your carbon impact using a generator is your best choice. People prefer using propane tanks these days. In contrast to a typical residential home, the latter uses less energy.
Hybrid Strategy
The advantage of this system is that it combines both the conventional power grid and the solar power source. Both supplies will feed into a net meter power meter, and the power will flow into your tiny house.
To be on the safer side, you should involve a qualified electrician because it becomes rather tricky very soon.
How Much Power Does a Tiny House Need?
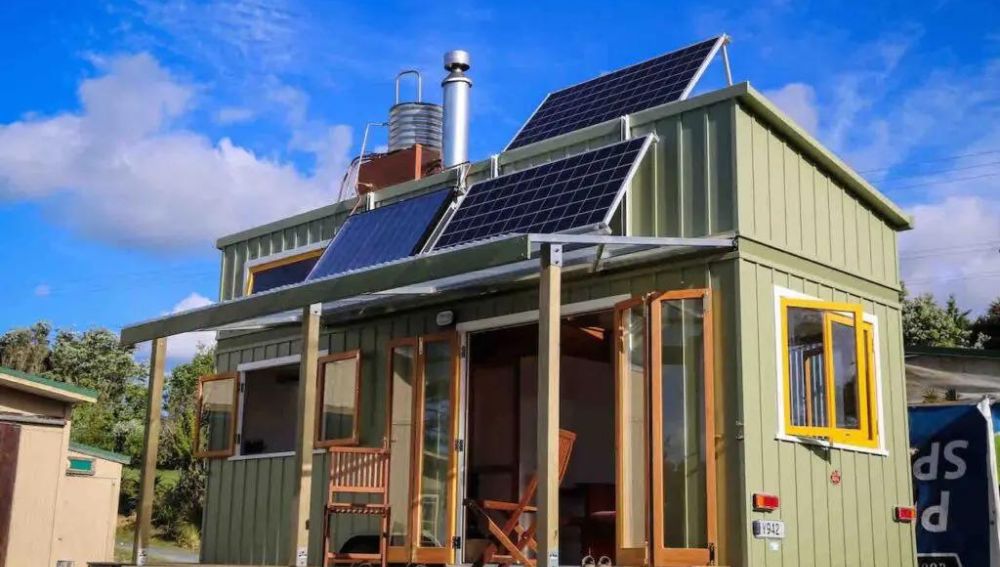
If you live in a tiny home, you can be sure you’ll use less electricity than someone living in a large, standard home. You will use fewer appliances and utilities because your house is small.
A high electricity bill results from large power consumption, which you don’t want, especially if you’re living off the grid or on a tight budget. For tracking purposes, it may be of interest to you to calculate your tiny house’s power consumption. Here is a simple breakdown.
Power is the value of Current × Voltage. Since most tiny houses accept 120V, the power consumption for a 2A TV becomes 2×120 = 240 Watts.
Note: You measure the power needed to operate the appliance you want to use for one second in watts (W). One kilowatt (kW) is equal to 1000 W. The unit to calculate how much energy every hour uses is the kilowatt per hour (kWh) unit.
If you spend 5 hours watching TV every day, then your average kilowatt hour value will be by multiplying the number of hours by the power consumption value of that appliance. (In this case, it is a 240W for the TV) and then dividing the result by the metric value of 1 kilo, 1000.
(5×240) ÷ 1000 = 1.2 kWh
In 30 days, calculate the average monthly usage of your TV by 1.2 × 30 = 36 kWh.
Repeat this process to discover how much each appliance will cost each month. Multiply their kWh value by the current rate you pay for electricity. Then add up everything to get the total.
Most tiny homes use a 50 A main service operating at 120 V (6000 W). It is more than adequate to power every appliance because you use only some of the devices at the same time. All you have to do is separate the circuits for the various machines.
These numbers become relevant when you consider every gadget that will use power in your home. This can also be helpful when comparing the cost recovery for any power system you install. Those who are building or thinking about building modern tiny houses know this well.
Once you’ve completed all these calculations and estimations, you’ll understand your power needs. You can use that information to choose which power source will work best for you.
Electrical Materials List For a Tiny House

Breaker Box
An electrical system for a tiny house receives power at the breaker box and distributes it. The power source (the grid, solar panels, etc.) provides energy. You can divide it into circuits. Each circuit in the house receives an exact number of electrical currents from each breaker through wires. A breaker will trip if there are too many appliances running at once. The breaker will trip if they use more current than the circuit can handle.
Your power company will often provide a 200 amp service by default, but you can request a smaller one. A higher capacity service and a bigger box than you’ll need is a good idea as the need might arise in the future.
Wires
There are many wire types, and every kind comes in various sizes or gauges. It’s crucial to select the correct wire for your application. A particular type of wire is better suited to damp environments. It provides a lot of current to a piece of equipment.
Romex (a generic brand name for this type of wire), or non-metallic sheathed wire, is the standard in households. Electricians will also use it for the wiring of a tiny house. Romex comes in various conductor strand counts, packed together to form the wire. Romex has two conductors (plus a ground conductor) or three conductors (plus a ground conductor). For Romex, the wire gauge and the number of conductors that make up the cable combine to form the wire labels. For instance, a line that is 14 gauge in size and comes with two conductors (plus a ground) falls under the category of 14-2.
A cable is a bundle of many strands of smaller copper conductors, while a wire is a single, solid copper conductor. Most people use the word “wire” when they mean a cable.
WIRE GAUGE
RATED AMPERAGE
COMMON USES
14-2 Romex
15 A
Lighting Circuits
12-2 Romex
20 A
Lighting & Outlets, Refrigerator
10-2 Romex
30 A
Electric Water Heater, Baseboard Heaters
10-3 Romex
30 A
Electric Clothes Dryer
Cable, Network, and Telephone Wires
You’ll also need to spend money on any extra wiring you want in the house. These cables may cause interference, so installing them away from electrical wires is better.
Circuit Breakers
Breakers are safety mechanisms that halt the flow of power in the event of an overload or a short circuit. As a result, they size them for the use they put in for their usage
Ground Fault Circuit Interrupters (GFCIs)

This is a safety feature that guards against leakage current or ground fault. GFCI aids in the prevention of electrical shocks. These interrupters are crucial for installations in wet areas like:
- Bathrooms
- Kitchens
- Outdoor spaces
When it detects any leakage exiting the circuit, it switches off and cuts off the supply.
The reason behind their usage is the risk increase in damp surroundings. When an appliance comes into touch with water, a leakage current flows through the grounded body of a person. As a result, the GFCI checks the amount of current entering the load (appliance) “via live wire” and leaving the load “through the neutral wire.” It then interrupts the current supply if there is any difference between the two.
Arc Fault Circuit Interrupters (AFCIs)
Like a GFCI, it shuts off the electrical supply when it detects an arc. High power discharges occur at arc faults between two conductors. Arcs can develop due to poor wiring when you drive a nail into wires, sloppy cable joints, or other problems. Older cables or loose connections in power outlets might also result in an electrical arc.
These constant arcs pose a sizeable risk to both property and human life. They have the potential to produce heat strong enough to cause a fire. They can interfere with the operation of any delicate electronic gadget.
Wire Staples
Place wire staples using a hammer to keep the interior wiring against the studs. They often keep the wires in place before they enter an outlet box.
How Do You Wire A Tiny House For 50A Service?
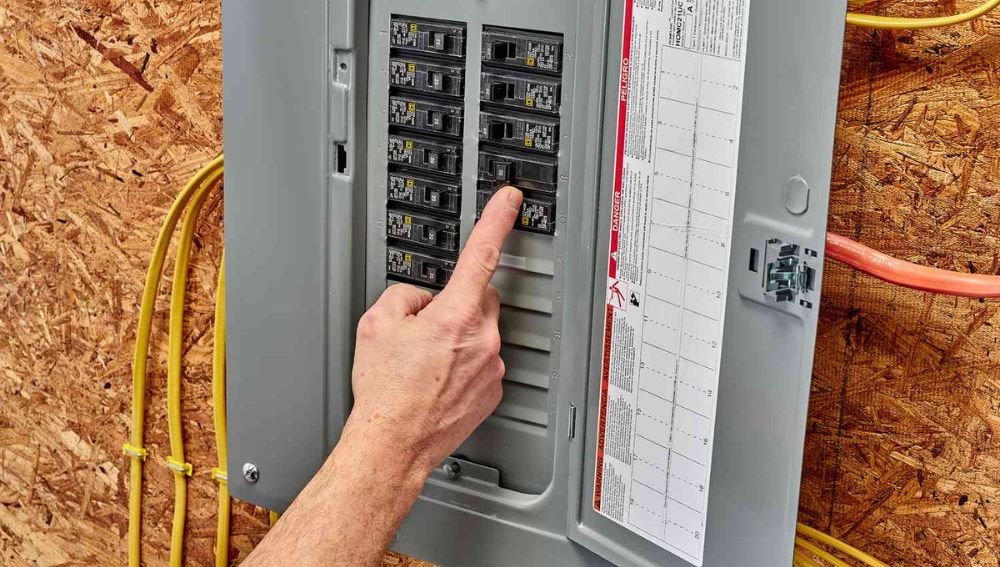
As said earlier, the National Electric Code (NEC) is the first thing I recommend you check out before you start your house wiring. Every regulation is based on an incident that went wrong in the past, so they are in place to safeguard you and other people.
You can now wire a tiny house for 50A service by understanding how electricity functions and flows through a tiny house. Here are some steps to follow:
Transferring Power from the Pole to the Panel
Install an electrical input port to connect an extension cord outside your house. From there, you wire the electrical intake to the service panel for your electrical system (aka. Breaker box, fuse box, electrical panel).
Finding a service panel with the right size for a tiny house can be challenging. Unlike a typical home, it doesn’t need a 200 Amp main breaker and space for 30 distinct circuits. They refer to the main panel as a sub-panel. It can allow you to reduce it to a reasonable size.
Yet, to prevent electrocution while working on a circuit in your tiny house, turn off the main breaker before starting. The main breaker functions as a switch that lets electricity into your service panel, where it may power other circuits. Other security measures include:
- Unplugging
- Turning off the circuit supplying the plug (at the campground, your friend’s house, etc.)
Planning Your Circuitry
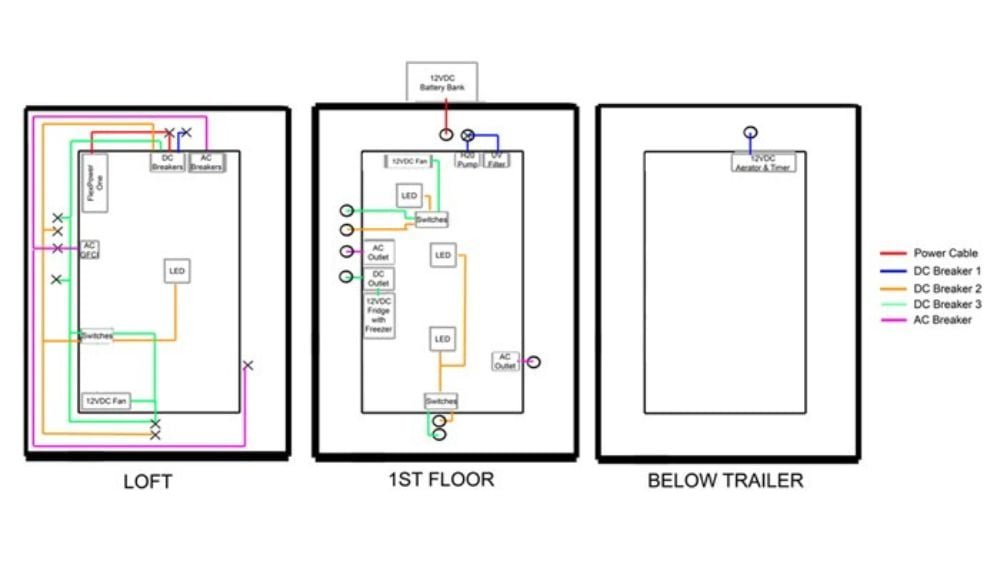
The many circuits running throughout your tiny house’s electrical system need proper planning. Depending on how compact your tiny house’s electrical system is, it could fit everything on a single circuit.
It’s a good idea to divide everything into circuits, depending on the type and position. You could divide the tiny home into 4 electrical circuits:
- Lighting
- Kitchen outlets
- Extra indoor receptacles
- Outdoor wall sockets
The wiring will run from the service panel outside through your tiny house to complete the circuit. Check their dimensions by checking the wires used are the right size for your electrical requirements. Most lighting circuits with outlets will be 15 Amps. But your kitchen countertop should have a 20 Amps receptacle circuit.
Planning the components of each circuit comes next. For instance, your lighting system may include lights for the living room, porch, loft, bathroom, and kitchen. You will repeat the same wiring step for each circuit, figuring out how many outlets you want to include. You will roughly estimate where they’ll go.
Review The Electrical Work In Your Tiny House
When doing electrical work, it can only sometimes be perfect. There will be errors and incorrect assumptions, so give yourself time to review your work.
Also, choosing a tiny house means giving up only some of the luxuries you enjoy. Instead, it means maximizing your ones and getting rid of the extras. Make the necessary plans to avoid figuring out how to power a unit a second time if your tiny home needs air conditioning to make life comfortable.
How Does Electricity Flow Through a Tiny House?

For a 50A 120V powered tiny house, electricity travels through in the following order:
- Electrical outlet (outlet from an existing home, RV outlet, or off-grid solar)
- RV power cable (rated for 50A)
- Plug for electricity (brings power into the tiny house, rated for 50A)
- Supply chain (brings power from the inlet to the electrical box, rated for 50A)
- Power panel (accepts electricity from the supply line. Then distributes it to different electrical circuits, rated for 100A)
- Transfer electricity through electrical circuits to outlets and switches.
- Outlets/Switches/Fixtures (endpoints where electricity gets used)
Frequently Asked Questions
Can I Wire a Tiny House Myself?
Yes, you can. You don’t need a college degree or license to do essential electrical work. There is already enough guidance for you in this article. But if, per adventure, you start to doubt your skills and prior knowledge about electric wiring, you can then involve a professional.
How Many Volts Does A Tiny House Use?
The voltage that passes through the wiring in a home is often 240 volts. You may use 240 or 120 for a tiny dwelling. This is so that they can operate on 120 volts, equal to half of 240 volts.
How Long Does Wiring A Tiny House Take?
You can complete electrical finishes in one day and electrical rough-in between 1-2 days.
How Much Does Wiring A Tiny House Cost?
If you hire an electrician, wiring your tiny house will often be between $1,500 to $3,300 in materials and labor. Exclude appliances and lighting fixtures because of their vast price ranges.
