

First, It’s important to understand what causes ceiling damage in the first place. Whether it’s a leaky roof, water damage from a burst pipe, or just wear and tear over time, there are many factors that can lead to ceiling damage.
In this article, we will discuss the most common signs of tiny house ceiling damage. We will also cover the types of damage you may come across and provide a step-by-step process for repairing your ceiling.
So let’s get started!
Contents
- 1 What are the Causes of Ceiling Damage?
- 2 What Are the Most Common sign of Tiny House Ceiling Damage?
- 3 What types of ceiling damage can occur in your tiny home?
- 4 Step By Step Process: How to repair tiny house ceiling
- 5 How to Repair Old Tiny House Ceiling Damage?
- 6 How Much Does Ceiling Repair Cost?
- 7 Conclusion
What are the Causes of Ceiling Damage?

Just as a tree cannot bear fruit if its roots are rotten, various underlying causes can lead to ceiling damage that requires addressing. As a tiny house owner, it is important to understand the causes of ceiling damage in order to take appropriate repair measures.
Water damage is a common cause of ceiling damage. It can seep into the ceiling through the roof or walls, causing cracks and holes to appear. If left unaddressed, water damage can lead to mold growth, which can be hazardous to your health.
Another cause of ceiling damage is structural problems. If your tiny house is not built correctly or is not well-maintained, the ceiling can start to sag or crack. The weight of the roof can also cause the ceiling to bow or become uneven. In this case, it’s essential to address the underlying structural issues before attempting any repairs to the ceiling.
Lastly, age and wear and tear can also cause ceiling damage. Over time, tiny house ceilings can become brittle, crack, and develop holes. If you notice any signs of damage, it’s crucial to address them before they worsen. Simple repairs, such as filling in cracks and holes, can prevent further damage and extend the lifespan of your tiny house ceiling.
Knowing the causes of ceiling damage is essential in determining how to repair tiny house ceilings. However, it’s also essential to know the signs of damage. Next, we’ll discuss the most common signs of tiny house ceiling damage and how to address them.
What Are the Most Common sign of Tiny House Ceiling Damage?
When you notice any cracks or discoloration in the uppermost part of your abode, it could be a sign that your overhead structure needs some attention. These are the most common signs of tiny house ceiling damage.
The good news is that there are ways to repair your ceiling without having to call in a professional. With a little bit of elbow grease and some patience, you can repair ceiling cracks in your old house or even fix a drooping ceiling in your home.
One of the most common types of ceiling damage is a crack. If you have an older home, cracks in the ceiling can be a sign of settling or foundation issues. To repair a crack in your ceiling, you’ll need to first clean the area around the crack and then apply joint compound. Once the compound has dried, sand it down and apply a second coat. You may need to repeat this process a few times until the crack is completely filled.
Another type of ceiling damage is water damage. This can occur if there is a leak in your roof or if water has seeped through the walls. To repair water damage, you’ll need to first fix the source of the leak. Then, you can cut out the damaged area of the ceiling and replace it with a new piece of drywall. Be sure to prime and paint the area once the new drywall is in place.
In summary, there are a few different types of ceiling damage that can occur in your tiny home. From repairing ceiling cracks in an old house to fixing water damage, there are ways to fix your ceiling without having to call in a professional.
What types of ceiling damage can occur in your tiny home?
I’ve noticed that there are several types of ceiling damage that can occur in my tiny home.
One of the most common is water damage, which can cause discoloration and even lead to mold growth.
Another type is drywall cracks, The settling or shifting of the structure can cause it.
Finally, I’ve also seen instances of ceiling paint peeling, bulging or sagging ceilings, and mold growth. All of these can be signs of more serious damage that needs to be addressed promptly.
Water ceiling Damage

Causes of Water Ceiling Damage
- Leaky or burst pipes
- overflowing toilet or bathtub
- roof leaks
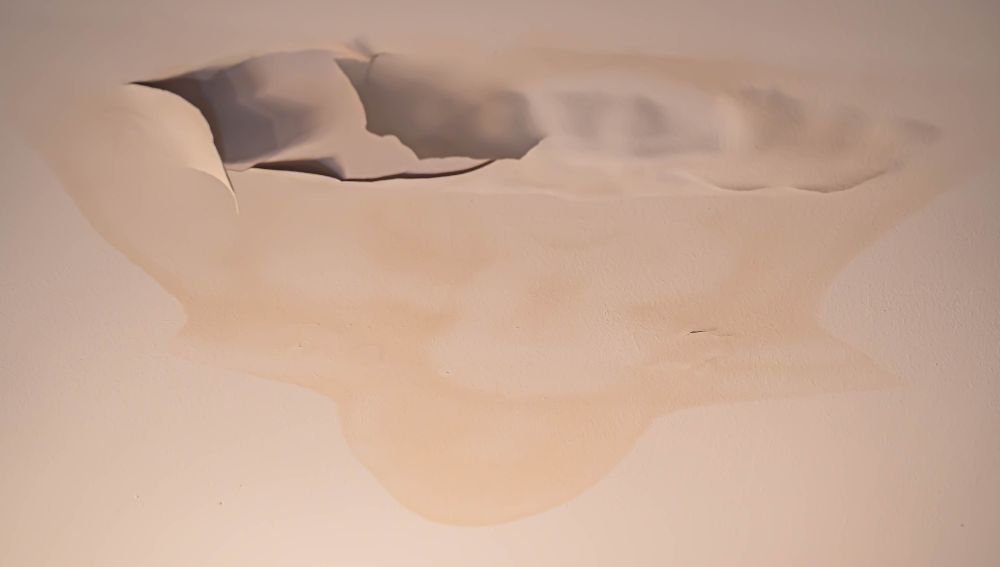
You never expected to see water stains on your beloved abode’s crown, but now the evidence of damage is staring you in the face. Water leaks can cause significant damage to your tiny house ceiling, leading to costly ceiling repair costs.
If the issue is not addressed promptly, the damage can worsen. You may even need to replace the entire ceiling. The first step to repairing water ceiling damage is to identify the source of the leak and fix it.
Once you’ve taken care of the underlying issue, you can begin repairing the damaged ceiling. It’s depending on the severity of the damage, you may need to replace the entire drywall or plaster or just patch up small sections. Don’t let water damage ruin your tiny house’s charm and coziness; address the issue as soon as possible.
Without a doubt, water leaks can be a nightmare for tiny homeowners, but it’s not the only type of ceiling damage you need to worry about. Drywall cracks can also occur, and we’ll discuss how to repair them in the next section.
Drywall Cracks

Causes of Drywall Cracks
- Age and wear
- Weight and pressure
- Moisture damage
- Poor installation
One must be vigilant about drywall cracks in their abode’s crown to maintain its elegance and charm.
Hairline cracks in the ceiling may seem like a minor issue, but they can worsen over time and lead to more significant damage.
To repair ceiling cracks, you’ll need drywall tape, joint compound, a putty knife, and sandpaper.
Start by cleaning the area around the crack with a damp cloth.
Apply the drywall tape over the crack, making sure it covers the entire length of the crack.
Then, apply a thin layer of joint compound over the tape, using the putty knife to smooth it out.
Let it dry completely, then sand it down until it’s smooth.
Repeat the process until the crack is no longer visible.
With this repair, your ceiling will look as good as new.
However, when you have peeling paint on your ceiling, it’s time to proceed to the next section.
Ceiling Paint Peeling

Causes of Ceiling Paint Peeling
- Poor surface preparation
- Use of low-quality paint
- Excessive moisture vapor
- Structural movement
This type of ceiling damage can by various factors such as moisture, improper application, or simply old age.
To repair the peeling paint, first, you need to remove all the loose paint. You can do this by using a scraper or sandpaper. Make sure to wear a mask and goggles to avoid inhaling dust particles or getting them in your eyes.
Once you’ve removed the peeling paint, you need to inspect the ceiling for any underlying damage. When there are cracks or holes, you will need to patch them up before repainting. Use a joint compound to fill in the cracks and holes and let it dry completely.
Then, sand the surface until it’s smooth and apply a primer before repainting. With these steps, you can easily repair your tiny house ceiling from paint peeling damage. However, if you notice bulging or sagging ceiling damage, you may need to take more drastic measures.
Bulging or sagging
Causes of Bulging or sagging
- Water damage
- Overloaded ceiling
- Age and wear
- Poor construction practices
Addressing bulging or sagging ceilings damage requires a thorough examination of the underlying structural issues. Professional intervention may be necessary to ensure the safety and stability of your home. A variety of factors, such as water damage, improper installation, or age, can contribute to this type of damage. It’s crucial to identify the root cause before attempting any repairs.
Once you have addressed the underlying issue, the ceiling repair process can begin. Depending on the severity of the damage, a simple patch may be sufficient, or You may need to replace entire sections of drywall. Ensuring that the repair is done properly is important to prevent any future issues.
With proper repair and maintenance, bulging or sagging ceilings can be fixed, and You can restore your tiny house to its former glory. Speaking of maintenance, let’s move on to the next topic of mold ceiling damage.
Ceiling Mold
Causes of Ceiling Mold
- Moisture
- Roof leaks
- Plumbing leaks
- Flooding or water damage
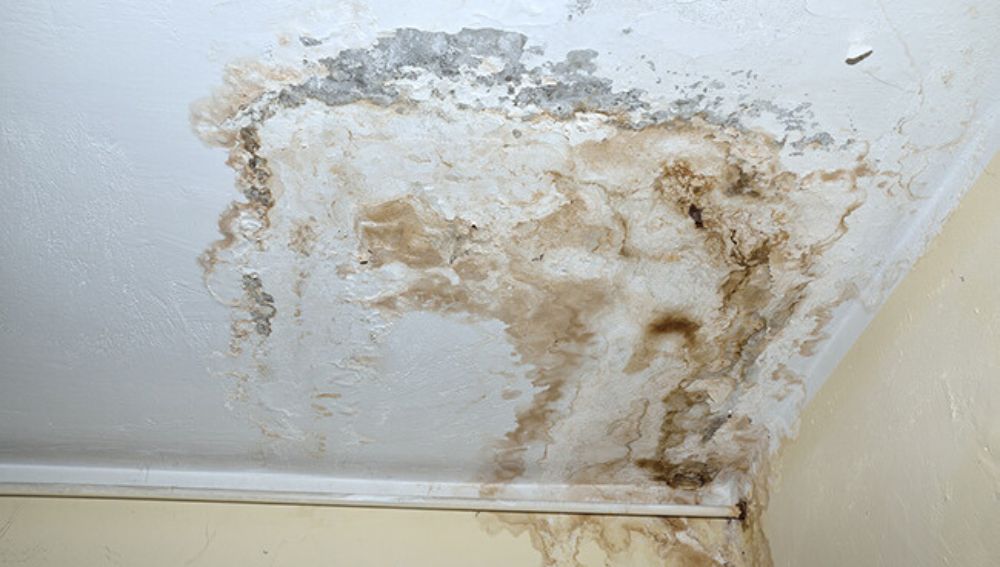
My heart sank as I noticed the mold growing on my tiny house ceiling. I knew that addressing this as a serious problem was necessary immediately.
Mold can cause health issues and spread quickly, so I had to act fast. I suspected that there was a ceiling leak causing the damp conditions that allowed the mold to grow in the first place.
To properly repair the ceiling, I needed to address the source of the moisture first. After locating and fixing the leak, I turned my attention to the moldy ceiling.
I carefully removed the affected drywall ceiling and disposed of it properly. Then, I thoroughly cleaned and disinfected the area to prevent any remaining mold spores from spreading.
Once the area was completely dry, I installed new drywall to restore the ceiling to its original state. With the mold problem under control, I was ready to move on to the next step in repairing my tiny house ceiling.
Step By Step Process: How to repair tiny house ceiling
When I noticed water damage on my tiny house ceiling, I knew I had to take action.
I did some research and found out that drywall ceiling repair and ceiling paint peeling repair were two common solutions. I have learned about drop ceiling repair and moldy ceiling repair. These skills will be useful for future repairs, including plaster ceiling hole repair.
Water Damaged Ceiling Repair
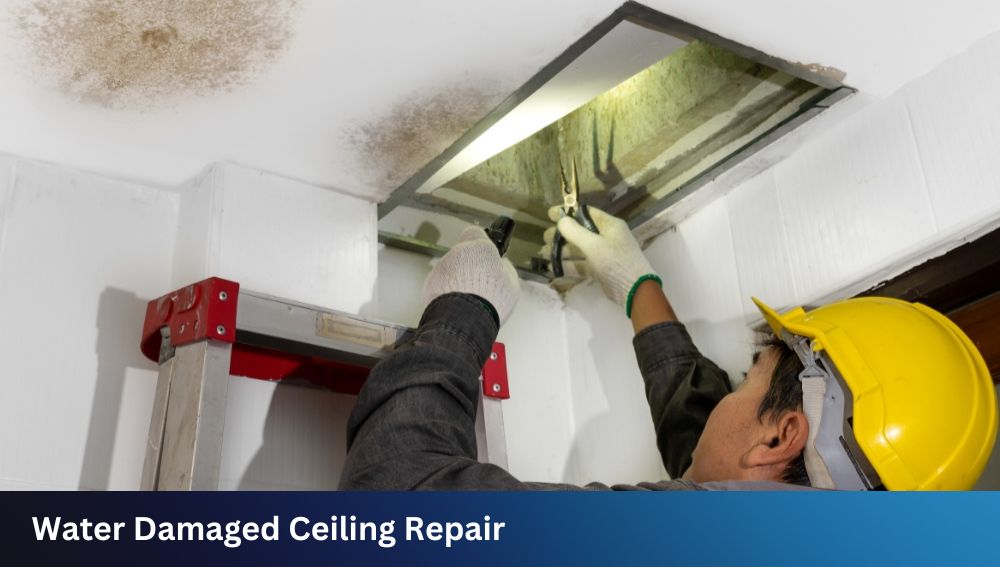
As I tackle the water damage on my tiny house ceiling, I think of the repair process as breathing new life into my cozy abode.
A leaking roof or a plumbing issue can cause water damage on a ceiling, but the important thing is to address it as soon as possible. The longer you wait, the more damage can occur and the more expensive the repair may become.
To begin the house ceiling repair, I first need to locate the source of the leak and fix it. Then, I can begin repairing the drywall. I’ll need to cut out any damaged drywall and patch it with a new piece.
It’s important to make sure the new drywall patch is secure and flush with the existing ceiling. Once the patch is in place, I can sand it down and apply a coat of primer before painting.
With a little bit of effort and attention, my tiny house ceiling will be as good as new. Now, onto the next step: drywall ceiling repair.
Drywall Ceiling Repair

Reviving a damaged ceiling can add character and charm to any home. The drywall repair process is an essential step in achieving a flawless finish. If you have a damaged drywall ceiling, there are a few things you need to consider before you begin the repair process.
First, you need to determine the extent of the damage. Assess whether it’s something you can repair yourself or if you need to call in a professional. If the damage is minor, you may be able to fix the issue yourself with a few simple tools and materials.
To begin, you’ll need to purchase the necessary materials for the repair. This typically includes drywall mud, a putty knife, sandpaper, and a drywall saw. The cost of materials can vary from a few dollars to several hundred dollars, depending on the extent of the damage and the size of the repair area.
For those on a tight budget, opting for a DIY approach can be a cost-saving option to consider. However, keep in mind that a textured ceiling repair may require more skill and experience than a standard drywall repair. Once you have the materials and tools, follow a step-by-step guide to complete the repair.
Now that you know the basics of drywall ceiling repair, it’s time to move on to the next step: fixing peeling paint on the ceiling.
Ceiling paint peeling repair

You can easily add some charm to your home by fixing the peeling paint on your ceiling. This type of repair isn’t difficult, but it does require patience and the right tools.
The first step is to remove the peeling paint with a scraper or sandpaper. Next, use joint compound to fill in any holes or cracks in the drywall. After the joint compound dries, sand it down and apply a thin layer of primer.
Finally, apply a new coat of paint to the ceiling, making sure to use paint that’s specifically designed for ceilings.
If your ceiling has a drop ceiling, the repair process is slightly different. Instead of using joint compound and tape, you’ll need to replace the damaged tiles or panels.
First, remove the damaged tile and measure the size of the opening. Next, cut a new tile or panel to the correct size and insert it into the opening. Finally, secure the new tile or panel in place and paint it to match the surrounding tiles.
With these simple steps, you can easily repair any damage to your ceiling and enjoy a beautiful, new look in your home.
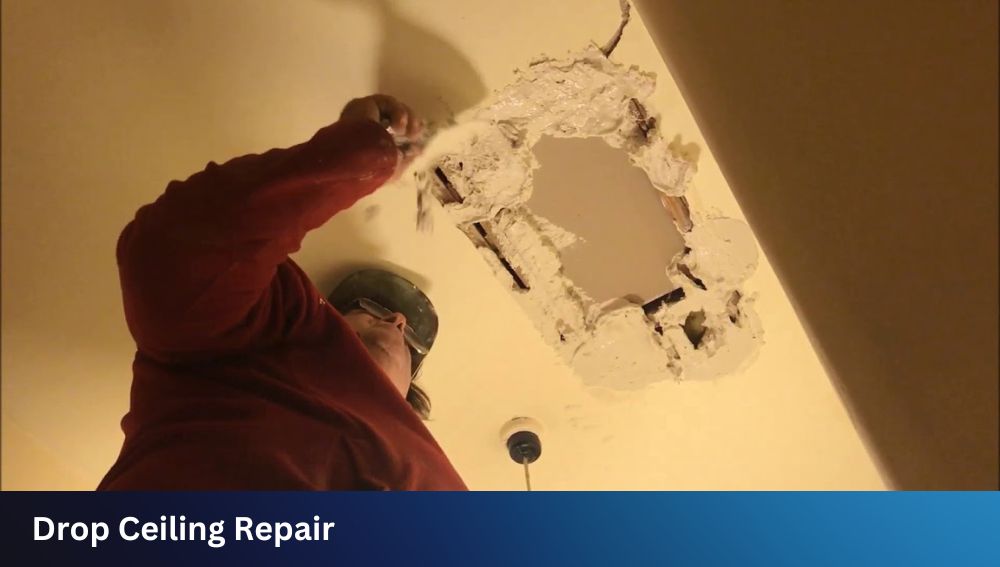
Drop Ceiling Repair
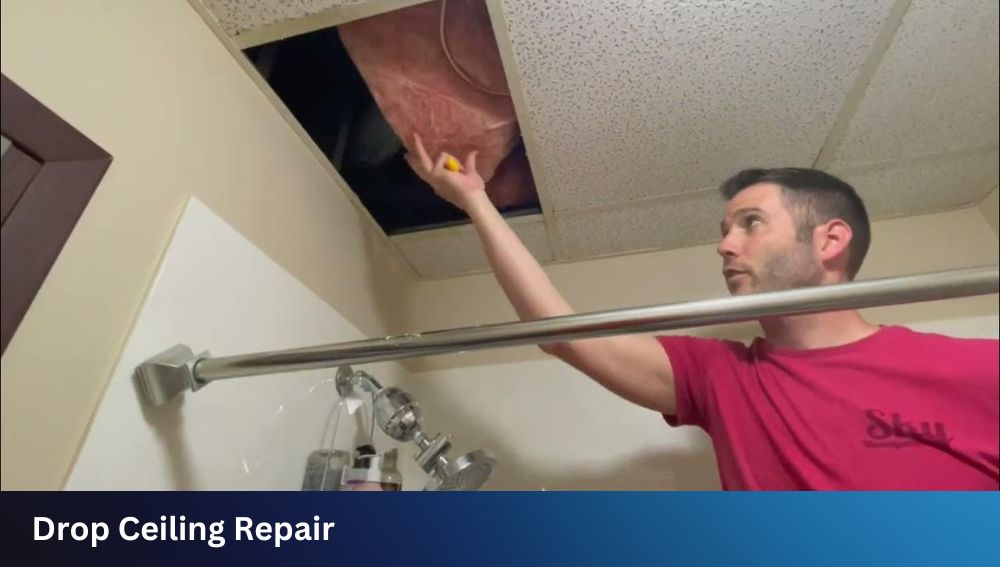
If you’re looking to spruce up a room, fixing your drop ceiling can give it a fresh and polished appearance. This is especially true if you’re working with a tiny house ceiling that needs repair.
Drop ceilings are a popular option in tiny homes since they’re lightweight, easy to install, and can help manage temperature and sound. However, they can also be prone to damage and wear and tear over time.
To repair a drop ceiling, start by removing any damaged tiles or panels. Then, use drywall compound to fill in any cracks or holes in the ceiling. Be sure to let the compound dry completely before sanding it down and applying a fresh coat of paint.
With a little bit of effort, you can have your drop ceiling looking as good as new in no time.
Now, let’s move on to the next section about moldy ceiling repair.
Moldy Ceiling Repair

Now that we’ve covered repairing a drop ceiling, let’s move on to a more serious issue: moldy ceiling repair. This is a common problem in tiny houses, especially those with poor ventilation.
To begin, it is crucial to identify and resolve the source of the mold growth, whether it stems from a leaky roof or excessive moisture in the air. Once that’s taken care of, it’s time to repair the damage.
In order to fix a moldy ceiling, the necessary steps involve removing the affected ceiling drywall and replacing it with new drywall. Before installing the new drywall, make sure to repair any cracks in the ceiling using joint compound and paper tape. For wider cracks, you may need to use mesh tape instead.
Once you have repaired the cracks, you can install the new drywall and finish it using joint compound and a trowel. Sand the surface smooth and apply a coat of primer before painting or adding texture.
Moving on to plaster ceiling hole repair, the process is similar to repairing drywall.
Plaster Ceiling hole Repair
Let’s dive into how to fix those pesky holes in your plaster ceiling, so you can enjoy a flawless home interior. First, gather the necessary tools: a putty knife, sandpaper, joint compound, and a drywall patch.
Then, clean the area around the hole and use the putty knife to apply joint compound over the hole, making sure to feather the edges. Allow it to dry completely, then sand it smooth. Continue repeating the process until you fill the hole and achieve a level surface.
Finally, apply the drywall patch and cover it with another layer of joint compound. Once it’s dry, sand it smooth again and you’re ready to paint.
If you have a trailer or tiny home with a plaster ceiling, it’s important to address any minor cracks or damage before they become bigger problems. To repair old damage, start by removing any loose plaster or debris around the damaged area.
Then, apply joint compound to the area with a putty knife, making sure to cover the entire crack or damaged area. Allow it to dry completely, then sand it smooth. Repeat the process until the damage is filled and the surface is level.
Finally, paint over the repaired area to match the rest of the ceiling. By taking care of these small repairs, you can maintain the beauty and integrity of your home interior.
How to Repair Old Tiny House Ceiling Damage?
Revitalize the uppermost part of your quaint abode by remedying any previous harm done to the overhead surface. As a tiny house owner, I know that interior damage can come unexpectedly, especially when you live in a trailer. One of the most common issues is a broken ceiling. Luckily, repairing a damaged drywall ceiling is relatively easy and affordable.
To start, you’ll need to assess the extent of the damage. If the hole is small, you can simply patch it up with spackle or joint compound. In cases where the damage is substantial, it becomes necessary to cut out the affected area and replace it with a new piece of drywall.
Make sure to measure the area precisely and cut the new piece to fit perfectly. Then, you will secure the drywall in place using screws and apply multiple coats of joint compound to achieve a smooth surface.
Once the joint compound is dry, you can sand the surface to achieve a flawless finish. Finally, you can paint the ceiling to match the rest of the room. With a little patience and effort, you can repair your tiny house ceiling and restore its charm.
Now that you know how to repair old tiny house ceiling damage, you might be wondering how much it will cost.
But before we talk about the cost, let’s first examine the different factors. These factors can affect the overall expense of repairing your tiny house ceiling.
How Much Does Ceiling Repair Cost?
As I ascend to the uppermost part of my cozy sanctuary, I may wonder about the financial toll of restoring the heavens above. If you’re dealing with a ceiling crack or other damage, the cost of repair will depend on several factors.
For instance, what’s causing the problem? Is it just cosmetic damage, or Do there exist any structural problems that need to be addressed? If your ceiling damage is merely cosmetic, you may be able to get away with patching it up with some joint compound. Implementing this solution is a cost-effective measure that can greatly enhance the appearance of your tiny home.
In cases of more severe damage, it may be necessary to completely replace the drywall panels. This will obviously be a more expensive fix. It involves purchasing new drywall and potentially hiring a professional to install it.
The total cost of repairing your tiny house ceiling will ultimately vary based on the extent of the damage and the materials and labor needed for the repair. It’s always a good idea to get an estimate from a professional before you start any repairs.
In the next section, we’ll explore another aspect of ceiling damage: how long it takes for water damage to show on the ceiling.
How long does it take for water damage to show on ceiling?
Curious about the timeline of water damage on your ceiling? Find out how long it takes for signs of water damage to appear in this section.
Water damage on the ceiling is a common issue that homeowners face. A leaky roof, burst pipe, or even condensation can cause it. The timeline for water damage to appear on your ceiling depends on the severity of the issue.
If you have a small leak, it may take weeks or even months for water damage to show up on your ceiling. However, if you have a larger leak, water damage can appear within a few hours. It’s important to address any leaks as soon as possible to prevent further damage to your home. Ignoring a leak can lead to mold growth, which can be harmful to your health.
In conclusion, it’s important to keep an eye out for signs of water damage on your ceiling. If you notice any discoloration or sagging, it’s time to call in a professional to assess the situation.
Next, we’ll discuss how to know if your ceiling leak is bad and needs immediate attention.
How do I know if my ceiling leak is bad?
Don’t ignore that pesky drip from the ceiling – learn how to tell if your leak is a serious problem that requires immediate attention.
As a tiny house owner, it’s important to keep an eye on your ceiling for any signs of water damage. The longer you wait to address a leak, the worse it can become.
One way to tell if your ceiling leak is bad is by the size and frequency of the drip. If it’s a small, occasional drip, it may not be a major issue. However, if you notice a large amount of water pooling on the ceiling, it’s time to take action.
Another sign of a serious leak is if you see water stains or discoloration on the ceiling.
It’s important to repair a ceiling leak as soon as possible to avoid further damage and potential safety hazards. Ignoring a leak can lead to mold growth, structural damage, and even electrical issues.
Don’t wait until it’s too late – take the necessary steps to fix the leak and prevent future damage to your tiny house.
Conclusion
So there you have it, step by step process of how to repair a tiny house ceiling. Remember: prevention is always better than cure, so make sure you take good care of your tiny home to avoid any damage in the first place.
But if you do encounter any issues, don’t panic. Just follow these steps, and you’ll have your ceiling looking as good as new in no time.
One example of a tiny house ceiling repair that I encountered was when I noticed a small water stain on the ceiling after a heavy rainstorm. I immediately jumped into action and followed the steps outlined in this article. I was able to identify and fix the source of the leak, and then proceeded to patch up the ceiling.
Thanks to this guide, my tiny home is now back to looking its best.