
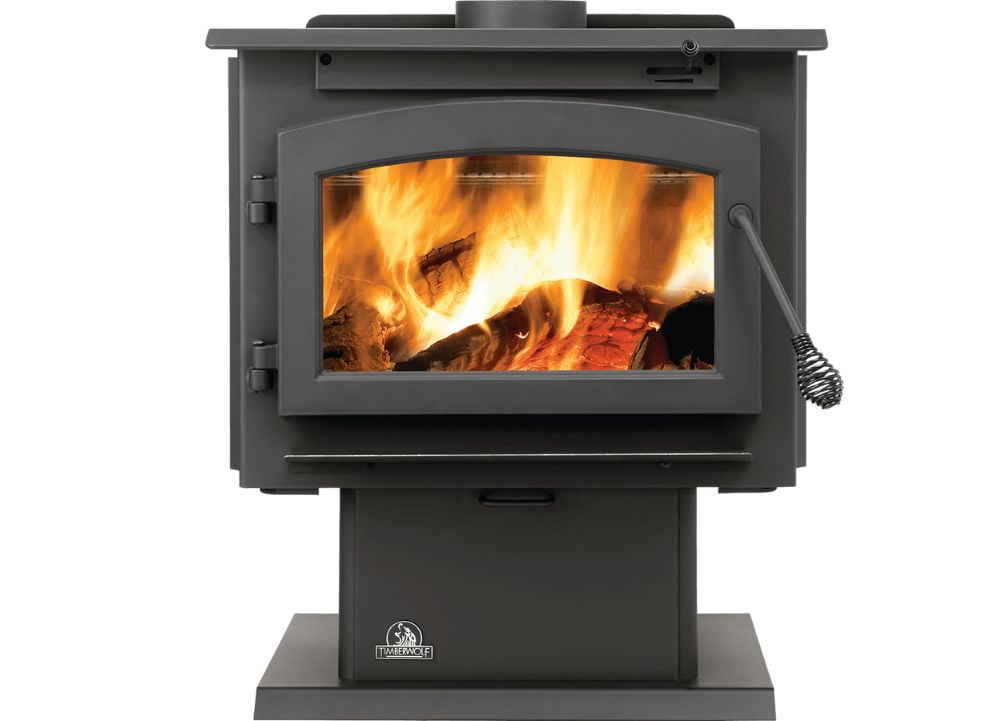
Are you considering adding a woodstove to your tiny house? If so, you’re in the right place! In this article, we’ll guide you through the process of installing and understanding how a woodstove works in your tiny home.
A woodstove can be a fantastic addition to your small living space, providing warmth, ambiance, and even a cooking surface. So, let’s dive in and explore the benefits of using a woodstove in a tiny house, how to choose the right one for your specific needs, the step-by-step installation process, and important safety considerations.
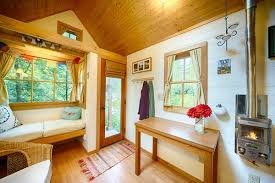
When it comes to heating your tiny house, a woodstove offers many advantages. Not only does it provide an efficient and cost-effective way to keep your space warm during colder months, but it also adds a cozy and rustic feel to your home.
Additionally, a woodstove can serve as a cooking surface, allowing you to prepare delicious meals while enjoying the crackling fire. However, it’s essential to choose the right woodstove for your tiny house, considering factors such as size, heat output, and fuel efficiency.
By following our comprehensive guide, you’ll be able to select the perfect woodstove for your needs and install it properly, ensuring a safe and enjoyable experience in your tiny home.
Contents
- 1 Understanding How a Woodstove Works
- 2 Benefits of Using a Woodstove in a Tiny House
- 3 How To Choosing the Right Woodstove for Your Tiny House
- 4 Step-by-Step Woodstove Installation Guide
- 4.1 Selecting the ideal location for the woodstove
- 4.2 Measuring and marking clearance distances
- 4.3 Preparing the installation area (fireproofing, flooring, etc.)
- 4.4 Assembling and connecting stovepipe components
- 4.5 Mounting and securing the woodstove
- 4.6 Installing heat shields and protective barriers
- 4.7 Testing for proper ventilation and draft
- 5 How To Ensuring Safety and Compliance
- 6 Wood Stove Common Problems and Solutions
- 7 What’s the average cost of purchasing and installing a woodstove?
- 8 Conclusion
Understanding How a Woodstove Works
If you want to understand how a woodstove works, you’ve got to first grasp the basic principles of combustion and heat transfer.
A wood stove relies on the process of combustion, which is the chemical reaction between fuel (wood) and oxygen in the presence of heat. When wood is burned in the stove, it releases heat energy as the carbon in the wood combines with the oxygen in the air. This heat energy is then transferred to the surrounding area through a combination of radiation, conduction, and convection.
Next, you need to consider the effects of airflow controls on efficiency. The airflow controls, such as dampers and vents, regulate the amount of oxygen that enters the stove. By controlling the airflow, you can control the rate at which the wood burns and the amount of heat that is produced. Proper airflow is crucial for efficient combustion and heat transfer.
If there is too much airflow, the fire may burn too quickly and produce less heat. On the other hand, if there is too little airflow, the fire may not burn efficiently, leading to incomplete combustion and the release of harmful pollutants.
Lastly, it is important to distinguish between radiant heat and convection heat when discussing a tiny house woodstove. Radiant heat is the direct transfer of heat from a hot surface to a cooler surface through electromagnetic waves. In the case of a woodstove, the hot surface is the firebox or the surface of the stove, and the cooler surface is the surrounding area.
On the other hand, convection heat is the transfer of heat through the movement of air or fluid. In a woodstove, convection heat is generated when the hot air rises from the firebox and circulates around the room. Understanding the difference between these two types of heat is essential for effectively heating a tiny house with a wood stove.
Benefits of Using a Woodstove in a Tiny House
By utilizing a woodstove, owners of compact living spaces can reap the advantages of efficient heating, lower utility expenses, and a reduced environmental footprint. Installing a tiny house woodstove is a relatively straightforward process that can be accomplished with some basic knowledge and tools.
The first step is to select a woodstove that is appropriately sized for your tiny house. Consider the size of the space you need to heat and ensure that the woodstove has the necessary heating capacity. Once you have chosen the right woodstove, you’ll need to prepare the installation site. This involves creating a non-combustible base, such as a fireproof hearth or heat-resistant flooring, to safely support the weight of the woodstove.
Next, you’ll need to install the necessary venting system for the woodstove. This typically includes a chimney pipe or flue that extends vertically through the roof of the tiny house. It’s essential to ensure that the venting system is properly insulated and sealed to prevent any leaks or potential fire hazards. Once the woodstove and venting system are in place, you can connect the woodstove to the chimney pipe or flue and secure it using the appropriate hardware. Finally, it’s crucial to follow all safety guidelines and recommendations provided by the manufacturer to ensure the safe operation of the woodstove in your tiny house.
The benefits of using a woodstove in a tiny house are numerous. Firstly, woodstoves offer efficient heating, providing a reliable and consistent source of warmth in a small space. They’re designed to burn wood efficiently, maximizing heat output while minimizing fuel consumption. This efficiency can help to lower utility expenses, as wood is often a more cost-effective heating option compared to electricity or propane.
Additionally, using a woodstove can contribute to a reduced environmental footprint. Wood is a renewable resource, making it a more sustainable choice for heating. By using a woodstove, you can decrease your reliance on fossil fuels and reduce carbon emissions. Overall, installing and using a woodstove in your tiny house can provide you with warmth, cost savings, and the satisfaction of knowing that you’re making a greener choice for your heating needs.
How To Choosing the Right Woodstove for Your Tiny House
When it comes to selecting the perfect woodstove for your compact living space, you’ll want to consider factors such as size, heating capacity, and the availability of fuel.
Since space is limited in a tiny house, it’s important to choose a woodstove that is small in size but still has enough heating capacity to keep you warm during colder months. You’ll want to measure the available space in your tiny house and look for a woodstove that fits comfortably without taking up too much room.
In addition to size, you’ll also need to consider the heating capacity of the woodstove. This refers to the amount of heat the stove can produce and how efficiently it can distribute it throughout your tiny house. Since you have limited space, you’ll want a woodstove that can efficiently heat your living area without wasting energy. Look for woodstoves that have high efficiency ratings and features such as air control systems that allow you to adjust the amount of heat produced.
Finally, don’t forget to consider the availability of fuel. Wood is a popular choice for tiny house woodstoves, but you’ll need to ensure that you have a reliable source of firewood nearby.
Choosing the right woodstove for your tiny house involves careful consideration of size, heating capacity, and fuel availability to ensure that you stay warm and cozy in your compact living space.
Step-by-Step Woodstove Installation Guide
When installing a woodstove in your tiny house, you’ll need to start by selecting the ideal location for it. Consider factors such as proximity to combustible materials, ventilation, and ease of access.
After determining the location, measure and mark the required clearance distances to ensure proper safety.
Next, prepare the installation area by fireproofing the surroundings and making sure the flooring is suitable for supporting the weight of the woodstove.
Once the area is ready, assemble and connect the stovepipe components, ensuring they’re securely fitted.
Finally, mount and secure the woodstove in place, following the manufacturer’s instructions for proper installation.
Selecting the ideal location for the woodstove
To find the perfect spot for your woodstove, imagine yourself cozied up on a snowy evening, savoring the crackling warmth and gazing out at the serene landscape surrounding your tiny house.
The location you choose for your tiny house woodstove is crucial for its installation and how it works. When selecting the ideal location, consider factors such as proximity to combustible materials, ventilation requirements, and the overall layout of your tiny house.
First and foremost, ensure that the area surrounding your woodstove is free from any combustible materials, such as curtains, furniture, or wooden walls. It’s important to maintain a safe distance to prevent the risk of fire.
Additionally, make sure there is enough space around the woodstove for easy access and maintenance. Adequate ventilation is also essential for the proper functioning of your woodstove. Ensure that there is enough airflow for combustion and that the stovepipe is properly installed and connected to the chimney or flue.
Lastly, consider the layout of your tiny house. You want to place the woodstove in a central location that allows heat to circulate throughout the space efficiently.
By carefully selecting the ideal location for your tiny house woodstove, you can ensure a cozy and functional addition to your home.
Measuring and marking clearance distances
Now that you’ve selected the ideal location for your woodstove, it’s time to move on to the next step: measuring and marking clearance distances. This is a crucial part of the installation process as it ensures the safe and efficient operation of your stove.
To begin, you’ll need to refer to the manufacturer’s instructions for your specific woodstove model. These instructions will provide you with the recommended clearance distances for your stove. Clearance distances refer to the minimum distance that must be maintained between the stove and any combustible materials such as walls, furniture, or curtains. By adhering to these clearance distances, you can prevent the risk of fire and ensure proper ventilation for your woodstove.
Once you have the recommended clearance distances, use a tape measure to measure and mark these distances on the floor and nearby walls. It’s important to be precise and accurate in your measurements to ensure the stove is installed safely. You can use masking tape or chalk to mark these distances, making it easier to visualize the space required for the stove.
By taking the time to measure and mark these clearance distances, you can ensure a safe and efficient installation of your woodstove.
Preparing the installation area (fireproofing, flooring, etc.)
Before proceeding with the installation, make sure the area has been properly prepared with fireproof materials and appropriate flooring. Fireproofing is crucial to protect the surrounding area from the intense heat generated by the woodstove. Install fire-resistant materials, like cement board or fire-rated drywall, on the walls and ceiling around the installation area. This will help prevent the spread of fire and protect the structure of the tiny house.
Consider installing a fireproof barrier on the floor, such as a sheet of non-combustible material like ceramic tile or a metal plate. This will provide an extra layer of protection for the flooring, reducing the risk of fire damage.
Choose a non-combustible flooring material, such as ceramic tile or stone, for the installation area. These materials are not only fire-resistant but also easy to clean, making them ideal for a woodstove installation. Ensure that the flooring is properly installed and level to provide a stable base for the woodstove. Also, check the weight-bearing capacity of the flooring to ensure it can support the weight of the woodstove and any additional materials, like a hearth or chimney.
By properly fireproofing and choosing the right flooring for the installation area, you can create a safe and functional space to enjoy the warmth and coziness of your tiny house woodstove.
Assembling and connecting stovepipe components
Once you have gathered all the necessary stovepipe components, start by attaching the straight pipe to the top of the woodstove, ensuring a secure connection to prevent any leaks or smoke. For example, imagine you’re assembling a woodstove in your tiny cabin in the woods, and you carefully slide the straight pipe onto the stove’s outlet, feeling the satisfying click as it locks into place.
Make sure to follow these steps to properly assemble and connect the stovepipe components:
- Measure and cut the straight pipe to the appropriate length, allowing enough clearance from combustible materials like walls or ceilings.
- Attach the straight pipe to the woodstove’s outlet, making sure it fits snugly and securely.
- Use a high-temperature silicone sealant or fire-rated gasket to create an airtight seal between the woodstove and the stovepipe.
Next, you’ll need to connect the remaining stovepipe components, such as elbows and sections of pipe, to create the desired venting configuration. Remember to follow the manufacturer’s instructions and local building codes to ensure a safe and efficient installation.
With the stovepipe components properly assembled and connected, you’re one step closer to enjoying the warmth and coziness of your woodstove in your tiny house.
Mounting and securing the woodstove
To fully experience the warmth and coziness of your cabin, it’s essential to securely mount and fasten your woodstove. When installing a woodstove in your tiny house, the first step is to choose a suitable location. Make sure to follow the manufacturer’s instructions regarding clearance requirements and the type of flooring that can be used with the stove.
Once you have identified the perfect spot, you can begin the mounting process. To mount the woodstove, start by placing a non-combustible floor pad or hearth pad in the designated area. This will provide a safe and stable base for the stove. Next, carefully position the stove on top of the pad, ensuring that it is centered and level. Use a sturdy metal bracket or anchor system to secure the woodstove to the wall or floor, depending on the manufacturer’s recommendations. This will prevent any movement or tipping of the stove, ensuring the safety of your tiny house.
Additionally, it’s important to secure the stovepipe to the woodstove using a pipe connector or collar. This will create a tight seal, preventing any smoke or gases from escaping into your living space. By following these steps, you can confidently enjoy the warmth and comfort provided by your securely mounted woodstove in your tiny house.
Installing heat shields and protective barriers
When installing heat shields and protective barriers, what steps can be taken to ensure the safety and efficiency of your woodstove?
First and foremost, it’s crucial to follow the manufacturer’s instructions for installing the heat shield and protective barrier for your tiny house woodstove. These instructions will provide you with specific measurements and guidelines to ensure proper installation.
Additionally, it’s important to choose high-quality materials for the heat shield and protective barrier to ensure maximum safety and efficiency. Heat shields should be made of non-combustible materials, such as sheet metal or ceramic tiles, and should be installed with the appropriate air gap between the shield and the combustible wall. This air gap helps prevent the transfer of heat from the woodstove to the surrounding walls, reducing the risk of fire.
In addition to installing heat shields, it’s also recommended to use a protective barrier around the woodstove. This barrier acts as a physical barrier between the woodstove and any flammable materials in the surrounding area. It can be made of materials like heat-resistant glass or metal mesh, which allow for proper ventilation while preventing sparks or embers from escaping.
When installing the protective barrier, ensure that it’s securely mounted and properly sealed to prevent any gaps or openings. This will help contain any potential sparks or heat from the woodstove within the designated area, reducing the risk of fire hazards.
By taking these steps to install heat shields and protective barriers, you can enhance the safety and efficiency of your tiny house woodstove, providing you with peace of mind while enjoying the cozy warmth it brings to your home.
Testing for proper ventilation and draft
Proper ventilation and draft in a woodstove can be tested to ensure the cozy warmth fills the room like a gentle breeze on a crisp autumn day. When installing a tiny house woodstove, it’s crucial to check that there is adequate ventilation for the stove to function efficiently.
This can be done by opening a window or door slightly while the stove is lit and observing if the smoke is properly drawn up the chimney. If the smoke isn’t being drawn up, it indicates a poor draft, which can be remedied by adjusting the damper or checking for any blockages in the chimney.
It’s important to test for proper ventilation and draft before regular use to prevent the build-up of harmful gases, such as carbon monoxide.
In addition to checking the ventilation, it’s essential to ensure that the draft is strong enough to create a steady flow of air through the woodstove. A simple test can be done by holding a lit match near the stove’s door or any other opening and observing if the flame is drawn towards the stove. If the flame is pulled towards the stove, it indicates a good draft, while a weak or non-existent draft may require adjustments to the stove’s positioning or the chimney height.
Testing for proper ventilation and draft is crucial for the safe and efficient operation of a tiny house woodstove. By taking the time to perform these tests, you can enjoy the warmth and comfort of your woodstove without any worries.
How To Ensuring Safety and Compliance
Ensuring safety and compliance with local building codes and regulations is essential when installing and operating a woodstove in a tiny house. Not only will this help protect the occupants of the tiny house, but it will also prevent any potential fire hazards or other safety concerns.
Here are some important steps to follow to ensure safety and compliance with your tiny house woodstove installation:
- Check local building codes: Before starting the installation process, it’s crucial to research and understand the specific building codes and regulations in your area. This will ensure that you’re following all the necessary guidelines and requirements for installing a woodstove in a tiny house.
- Seek professional advice: If you’re unsure about any aspect of the installation process, it’s advisable to consult with a professional who has experience in installing woodstoves. They can provide guidance on the proper placement, ventilation, and other safety considerations specific to your tiny house.
- Install carbon monoxide detectors: Carbon monoxide is a colorless, odorless gas that can be produced by woodstoves. To ensure the safety of the occupants, it’s important to install carbon monoxide detectors near the woodstove and in other areas of the tiny house. This will alert you if there are high levels of carbon monoxide in the air, allowing you to take necessary actions to prevent any harm.
By following these safety measures and ensuring compliance with local building codes, you can enjoy the warmth and comfort of a woodstove in your tiny house without compromising the safety of yourself and others. Remember, safety should always be the top priority when it comes to installing and operating a woodstove in a tiny house.
Wood Stove Common Problems and Solutions
To address common wood stove issues with your tiny house woodstove, you can troubleshoot problems and find solutions that will improve the performance of your heating appliance.
One common problem is excessive smoke during startup. This can be caused by a variety of factors, such as a cold flue or a lack of sufficient airflow. To solve this issue, make sure that the flue is warmed up before starting the fire. You can do this by using a small amount of kindling or newspaper to create a small fire that will warm up the flue.
Additionally, ensure that there is enough airflow by opening the damper fully or adjusting the air intake controls as needed.
Another common problem with wood stoves is difficulty in lighting the fire. This can be frustrating, especially on cold winter mornings. To make lighting the fire easier, start by using dry and seasoned firewood. Wet or green wood can be difficult to ignite and may produce more smoke.
Additionally, make sure that the firebox is clean and free from any debris or ash buildup. This will allow for better airflow and make it easier for the fire to ignite. If you’re still having trouble, consider using fire starters or kindling to help get the fire going.
By troubleshooting these common problems and finding the right solutions, you can ensure that your tiny house woodstove is working efficiently and effectively to keep you warm.
What’s the average cost of purchasing and installing a woodstove?
Now that you have a better understanding of the common problems and solutions associated with wood stoves, let’s dive into the average cost of purchasing and installing a wood stove for your tiny house.
When it comes to selecting a small wood stove for your tiny house, there are various factors that can influence the cost. The size and type of stove, as well as any additional features or accessories, can all affect the price.
On average, the cost of purchasing a small wood stove can range from $500 to $3,000. This price range includes a variety of options, from basic models to more high-end and efficient ones.
Additionally, the cost of installation can vary depending on your specific circumstances. Factors such as the complexity of the installation, the materials needed, and any additional modifications required can all impact the installation cost. Generally, the installation cost can range from $500 to $2,000.
It’s important to keep in mind that these figures are just averages and can vary based on your location and the specific requirements of your tiny house. Therefore, it’s recommended to research and consult with professionals to get a more accurate estimate for your particular situation.
By understanding the average cost of purchasing and installing a wood stove, you can better plan and budget for this cozy addition to your tiny house.
Conclusion
You’ll be pleasantly surprised by the affordability and ease of incorporating a woodstove into your tiny house. Not only does it provide a cozy and warm atmosphere, but it also serves as an efficient heating solution for your compact living space. Installing a woodstove is a straightforward process that can be done by following a few simple steps.
First, you’ll need to choose the right location for your woodstove, ensuring that it meets safety regulations and allows for proper ventilation. Next, you’ll need to install a chimney or flue pipe to safely exhaust the smoke.
Once these steps are completed, you can start enjoying the benefits of your woodstove.
So, how does a woodstove work? It’s quite simple. A woodstove operates by burning wood, which produces heat that warms up the surrounding area. The heat is then radiated throughout the room, providing a comfortable and cozy environment.
The efficiency of a woodstove is impressive, as it can effectively heat a small space for a longer period of time compared to other heating options. Additionally, wood is a renewable and sustainable fuel source, making it an environmentally friendly choice.
In conclusion, installing a woodstove in your tiny house is a practical and efficient way to keep your living space warm and comfortable. Not only does it provide a cost-effective heating solution, but it also adds a charming and rustic touch to your home. So why not consider incorporating a woodstove into your tiny house and enjoy the many benefits it has to offer?